
10 Photo Tips for Taking Sunflower Pics (PHOTOS)
Sunflowers. Everyone is going crazy about the sunflower bloom. In the next 14 days all focus (ahh!) will be on the McKee-Beshers Wildlife Management Area (MBWMA) in Poolesville. I got out this weekend to take a sneak peak at the fields. Believe what the Maryland Department of Natural Resources (DNR) is telling you. The bloom dates are best around July 22 and for a few days afterwards. Maybe they should manage the Cherry Blossoms.
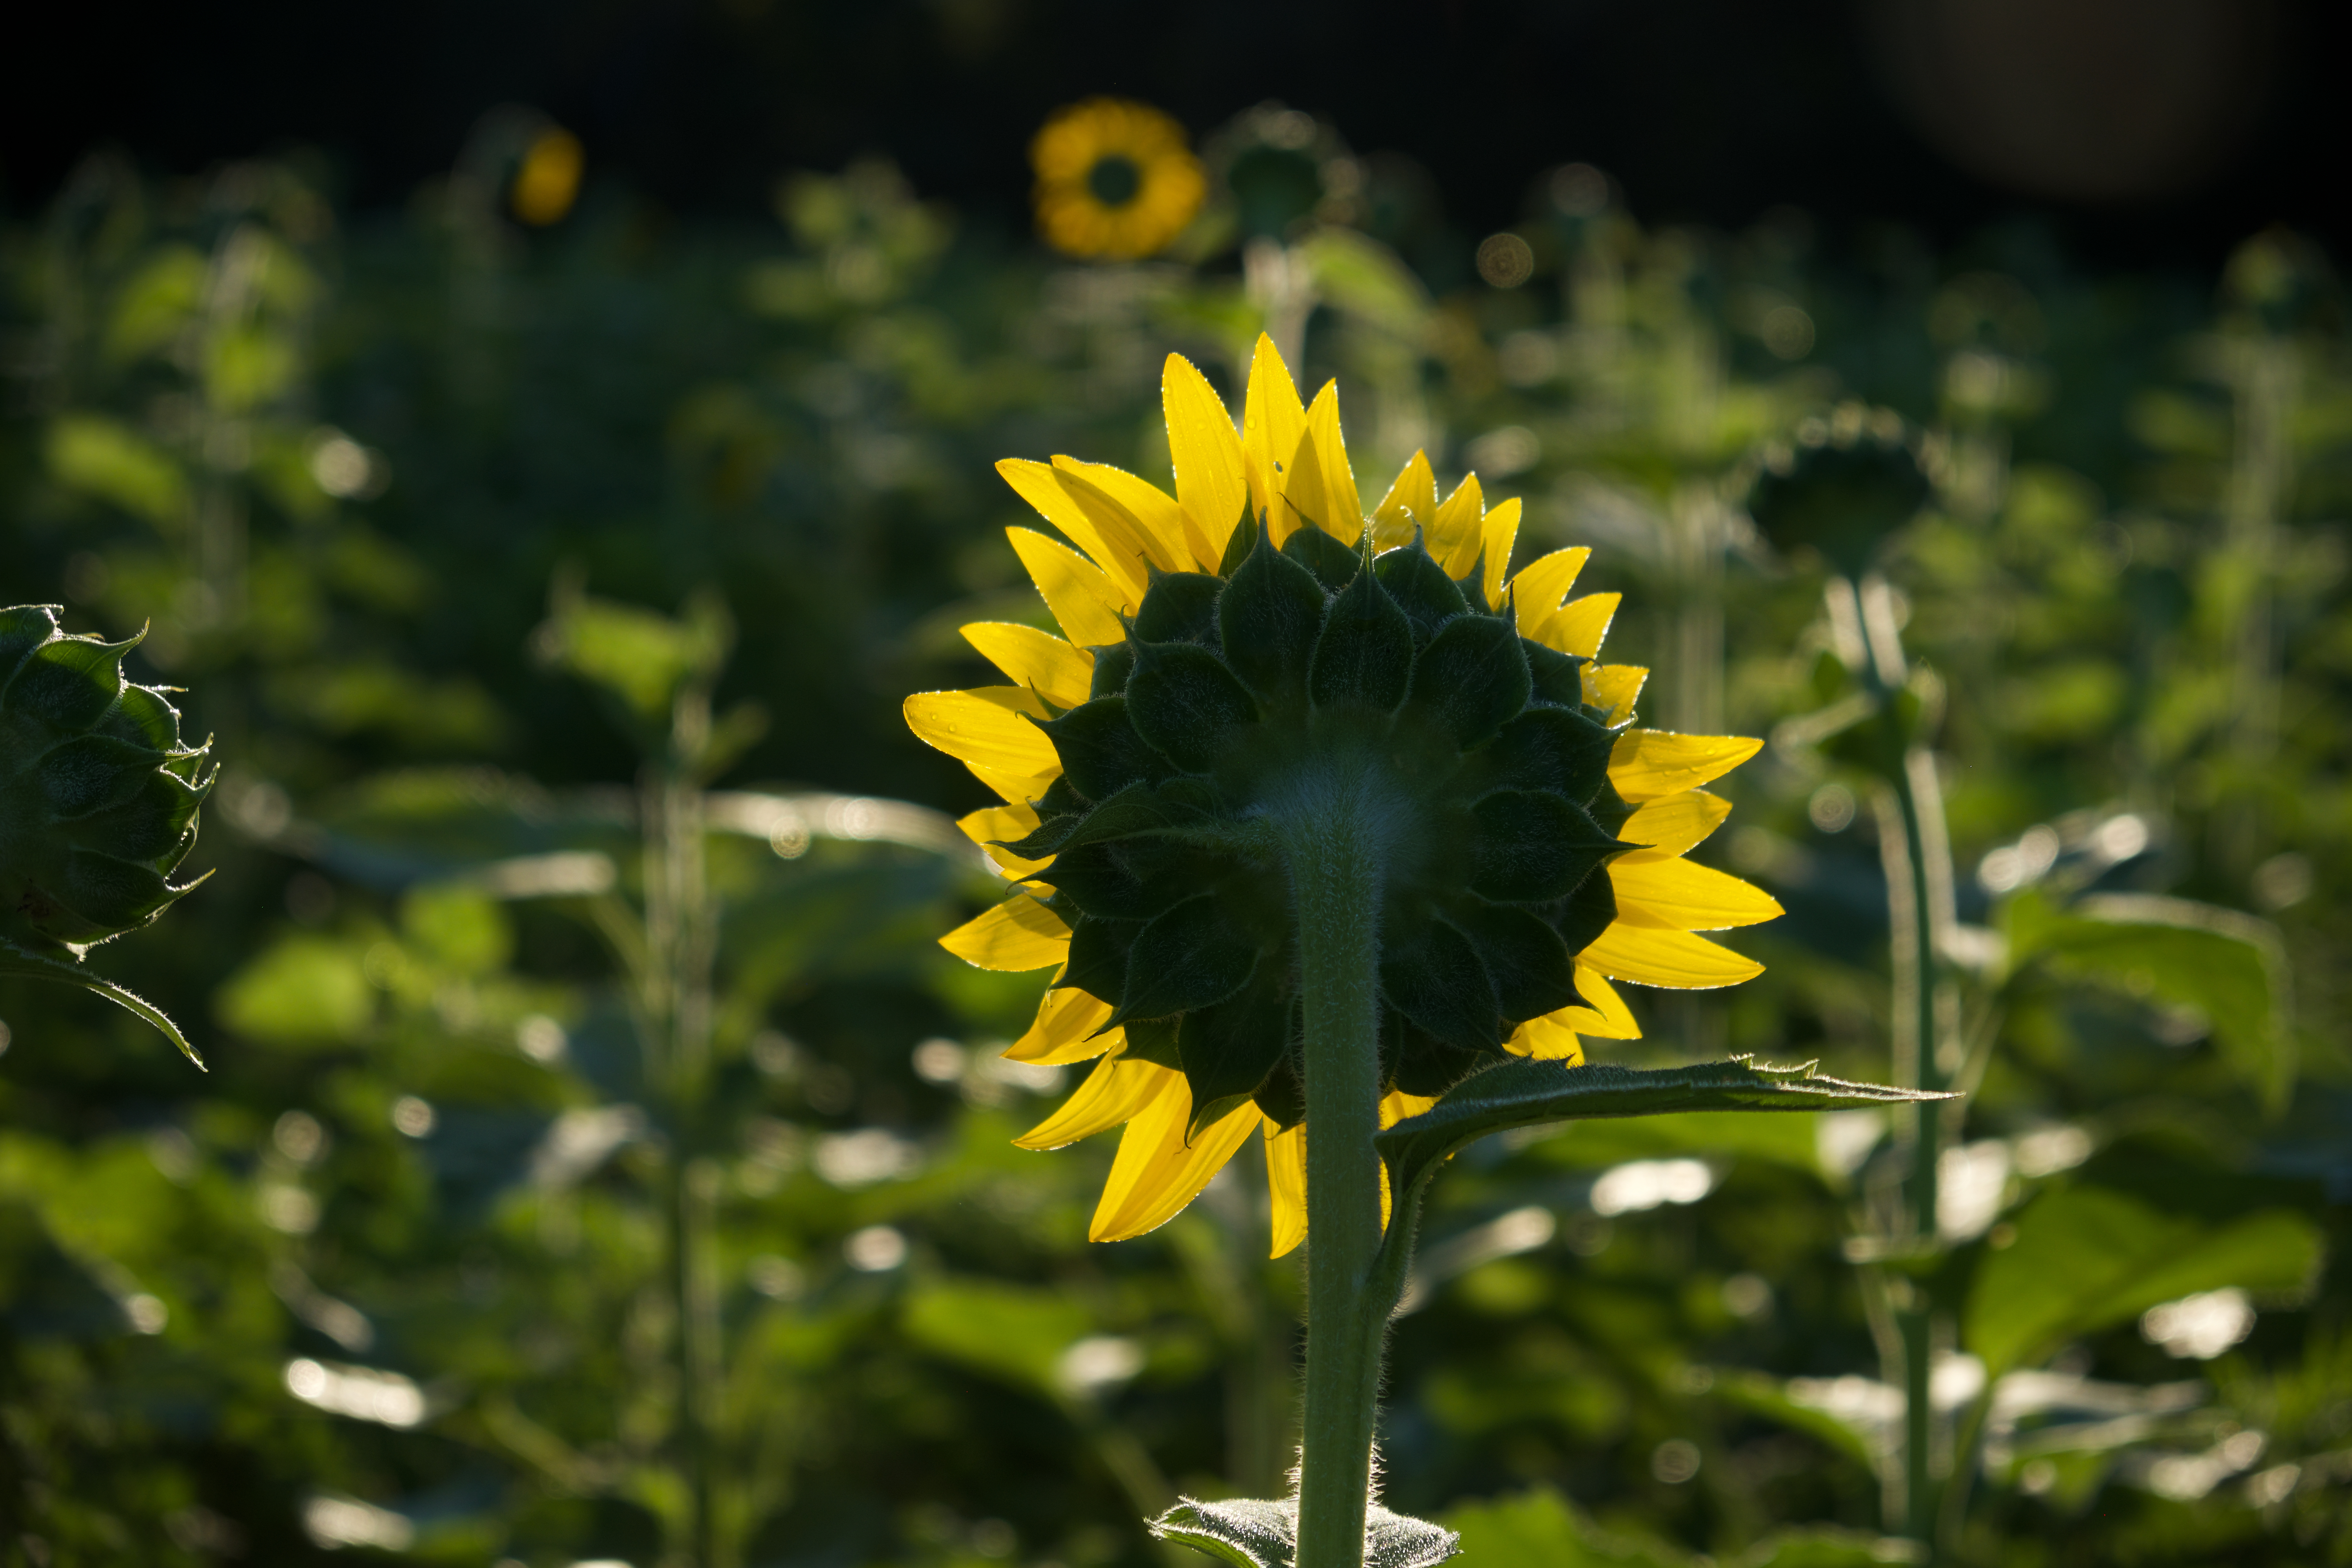
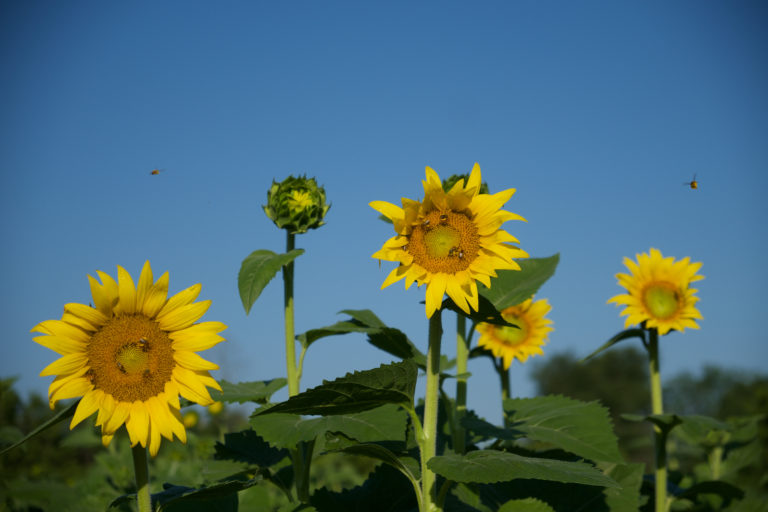
POOLESVILLE MD, July 16, 2017:
(Photo by Phil Fabrizio)
Meanwhile that gives all amateur and pro photographers and those of you with the best camera in your hand – your cellphone – time to study up.
So here my ten (10) tips for taking pictures of the Poolesville sunflowers.
But first let me give you my disclaimer, I am a sports photographer and as such I like things that move. If you have been reading this blog, you know that by now. Hint: flower photography takes patience – something that I sometimes lack. So I move and leave the flowers in their place. I am sure that there are many pro flower photographers who will bunch (aah!) up and blossom (two time aah!) across the fields next weekend. So for those of you who do visit River Road in Poolesville – give them and each other, a break. Pay attention to where you walk (more on that later).
Tip 1 – Dress for the action.
OK, know this – the fields are muddy, the mowed areas that surround the fields can be wet depending on the time of day. So, dress with walking shoes, boots or mountain gear including long pants if you plan to walk into the fields. Leave the flip-flops home. Wear a large brim hat so that you are seen and covered from the sun. Pants, the more the pockets the better wear pants or shorts with pockets. Lather up with bug spray and sun tan lotion in the parking lots before setting out to the fields.
Tip 2 – Bring a camera
That may sound obvious but really, if you have a camera, this is the time to use it. Smartphones are fine – they work quickly and can share photos instantly. However, details are in the image structure, the larger the image created, the larger the image you can print to frame or share. KNOW your camera. Pick up the instruction booklet NOW. If you want flower detail, bring a camera. If you want iPhone selfies with sunflowers, you can just as easily do that on the way to Poolesville at the Harris Teeter store on Darnestown Road in the flower department.
Tip 3 – Camera Settings – Get C.L.O.S.E.
I teach photography classes with the City of Gaithersburg at the Kentlands Arts Barn. The class is called – you guessed it – Get CLOSE. The letters for CLOSE stand for Composition, Light, Opportunity, Seeing, Exposure. So, let’s skip to the end for EXPOSURE. If you are at all new to your camera – use the “P” button or Program mode for taking a riskless photo. But if you want to live on the wild side – use the “A” Aperture Priority or the “M” Manual mode for experimenting with the image. Therefore the next two tips explain P and A/M in a little more detail. If you understand the difference then skip the next two tips.
Tip 4 – Program Mode – the big “P”
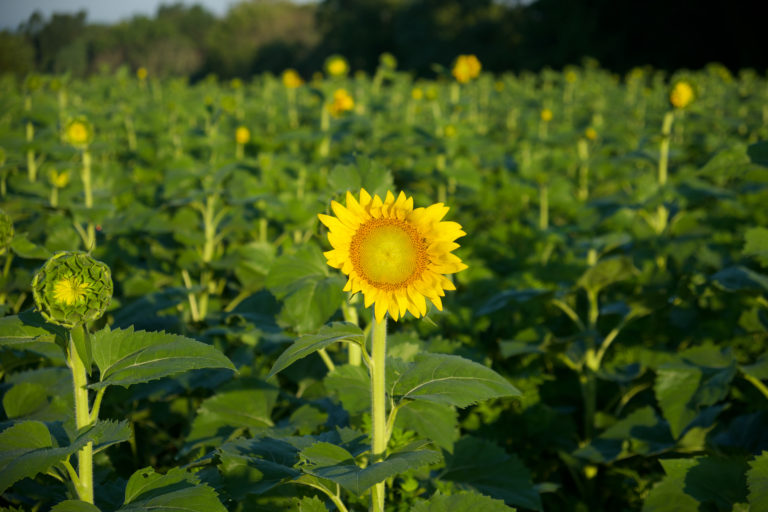
POOLESVILLE MD, July 16, 2017:
(Photo by Phil Fabrizio)
I use Nikons and Fuji cameras. The “P” election is readily visible as an exposure option. If you use other cameras like a Sony or Canon you will need to find the corresponding exposure setting. Chose the program mode first then position your ISO setting to something in the range of ISO 200 or 400, I am assuming you will be shooting in daylight. With those basic settings any photo that you take will produce an acceptable photo with good depth of field and sharp images. The camera’s computer will then chose the aperture and shutter speed that will let you hand hold your camera level to compose a pleasing image. Practice holding the camera viewfinder or screen at eye level and brace your camera by holding the lens in your left hand with your left elbow braced against your chest and the right forefinger on the shutter button. Then click away. For smartphones – you are basically always in a program mode and visualize the image by holding the screen at eye level.
Tip 5 – Aperture Priority and Manual Modes
Again using Nikon/Fuji as example the next two modes on the selection dial would be A or M. For Sony/Canon you will need to find the corresponding dial function. To use A or M function you may need a tripod or monopod to hold the camera still to minimize camera shake.
Aperture – controls the amount of light landing on the CCD screen inside your camera. The larger the physical opening (aperture) of the lens allows in more light – and has smaller depth of field for the image. The smaller the opening of the lens – produces less light but greater depth of field. Think of a faucet. Opening up the faucet all the way lets out the most water, while closing down the faucet to a trickle means less water. Same idea applies to aperture – more or less light, shallow or deep depth of field. With “A” priority the shutter speed is automatically set along with you properly setting the ISO, as previously described.
Manual function – by turning/choosing the M function you basically make the conscious decision on the aperture and speed for the conditions (environmental sunlight or lack thereof). Recently Apple has been promoting their “portrait function” on the iPhone for pleasing close up facial photography (by using an algorithm to make the effect pleasing). Try using that if you have a newer iPhone. It’s the same basic effect/affect that you can control.
So by using a combination of lenses (which I have not written about) and the Manual setting you can control the foreground or background and/or stop movement, as in action, of the subject flower(s) flower.
Tip 6 – Hey gunslinger shoot all 8 compass quadrants!
Seeing. It’s all in what you see and where the sun is. All cowboy westerns and now your sci-fi thrillers all eventually place the good guy with the sun to his/her back and the bad guy (eventually) out in the open light. So take your photo with the sun coming over your shoulder, watch your shadow, then move so that the sunflower is well lit and not shaded. Once you get that East to West shot then move around and shoot the flower(s) like points on a compass with you as the center of the compass. E, SE, S, SW, W, NW, N, NE. Seeing is believing. Sometimes the best shot is behind you (into the sun or from the profile side. PS: I don’t carry a tripod since I move rather than stand still (remember I am impatient) but that gives me the purposeful freedom to move side to side, squat, shoot skyward, to scrunch in between the stalks.
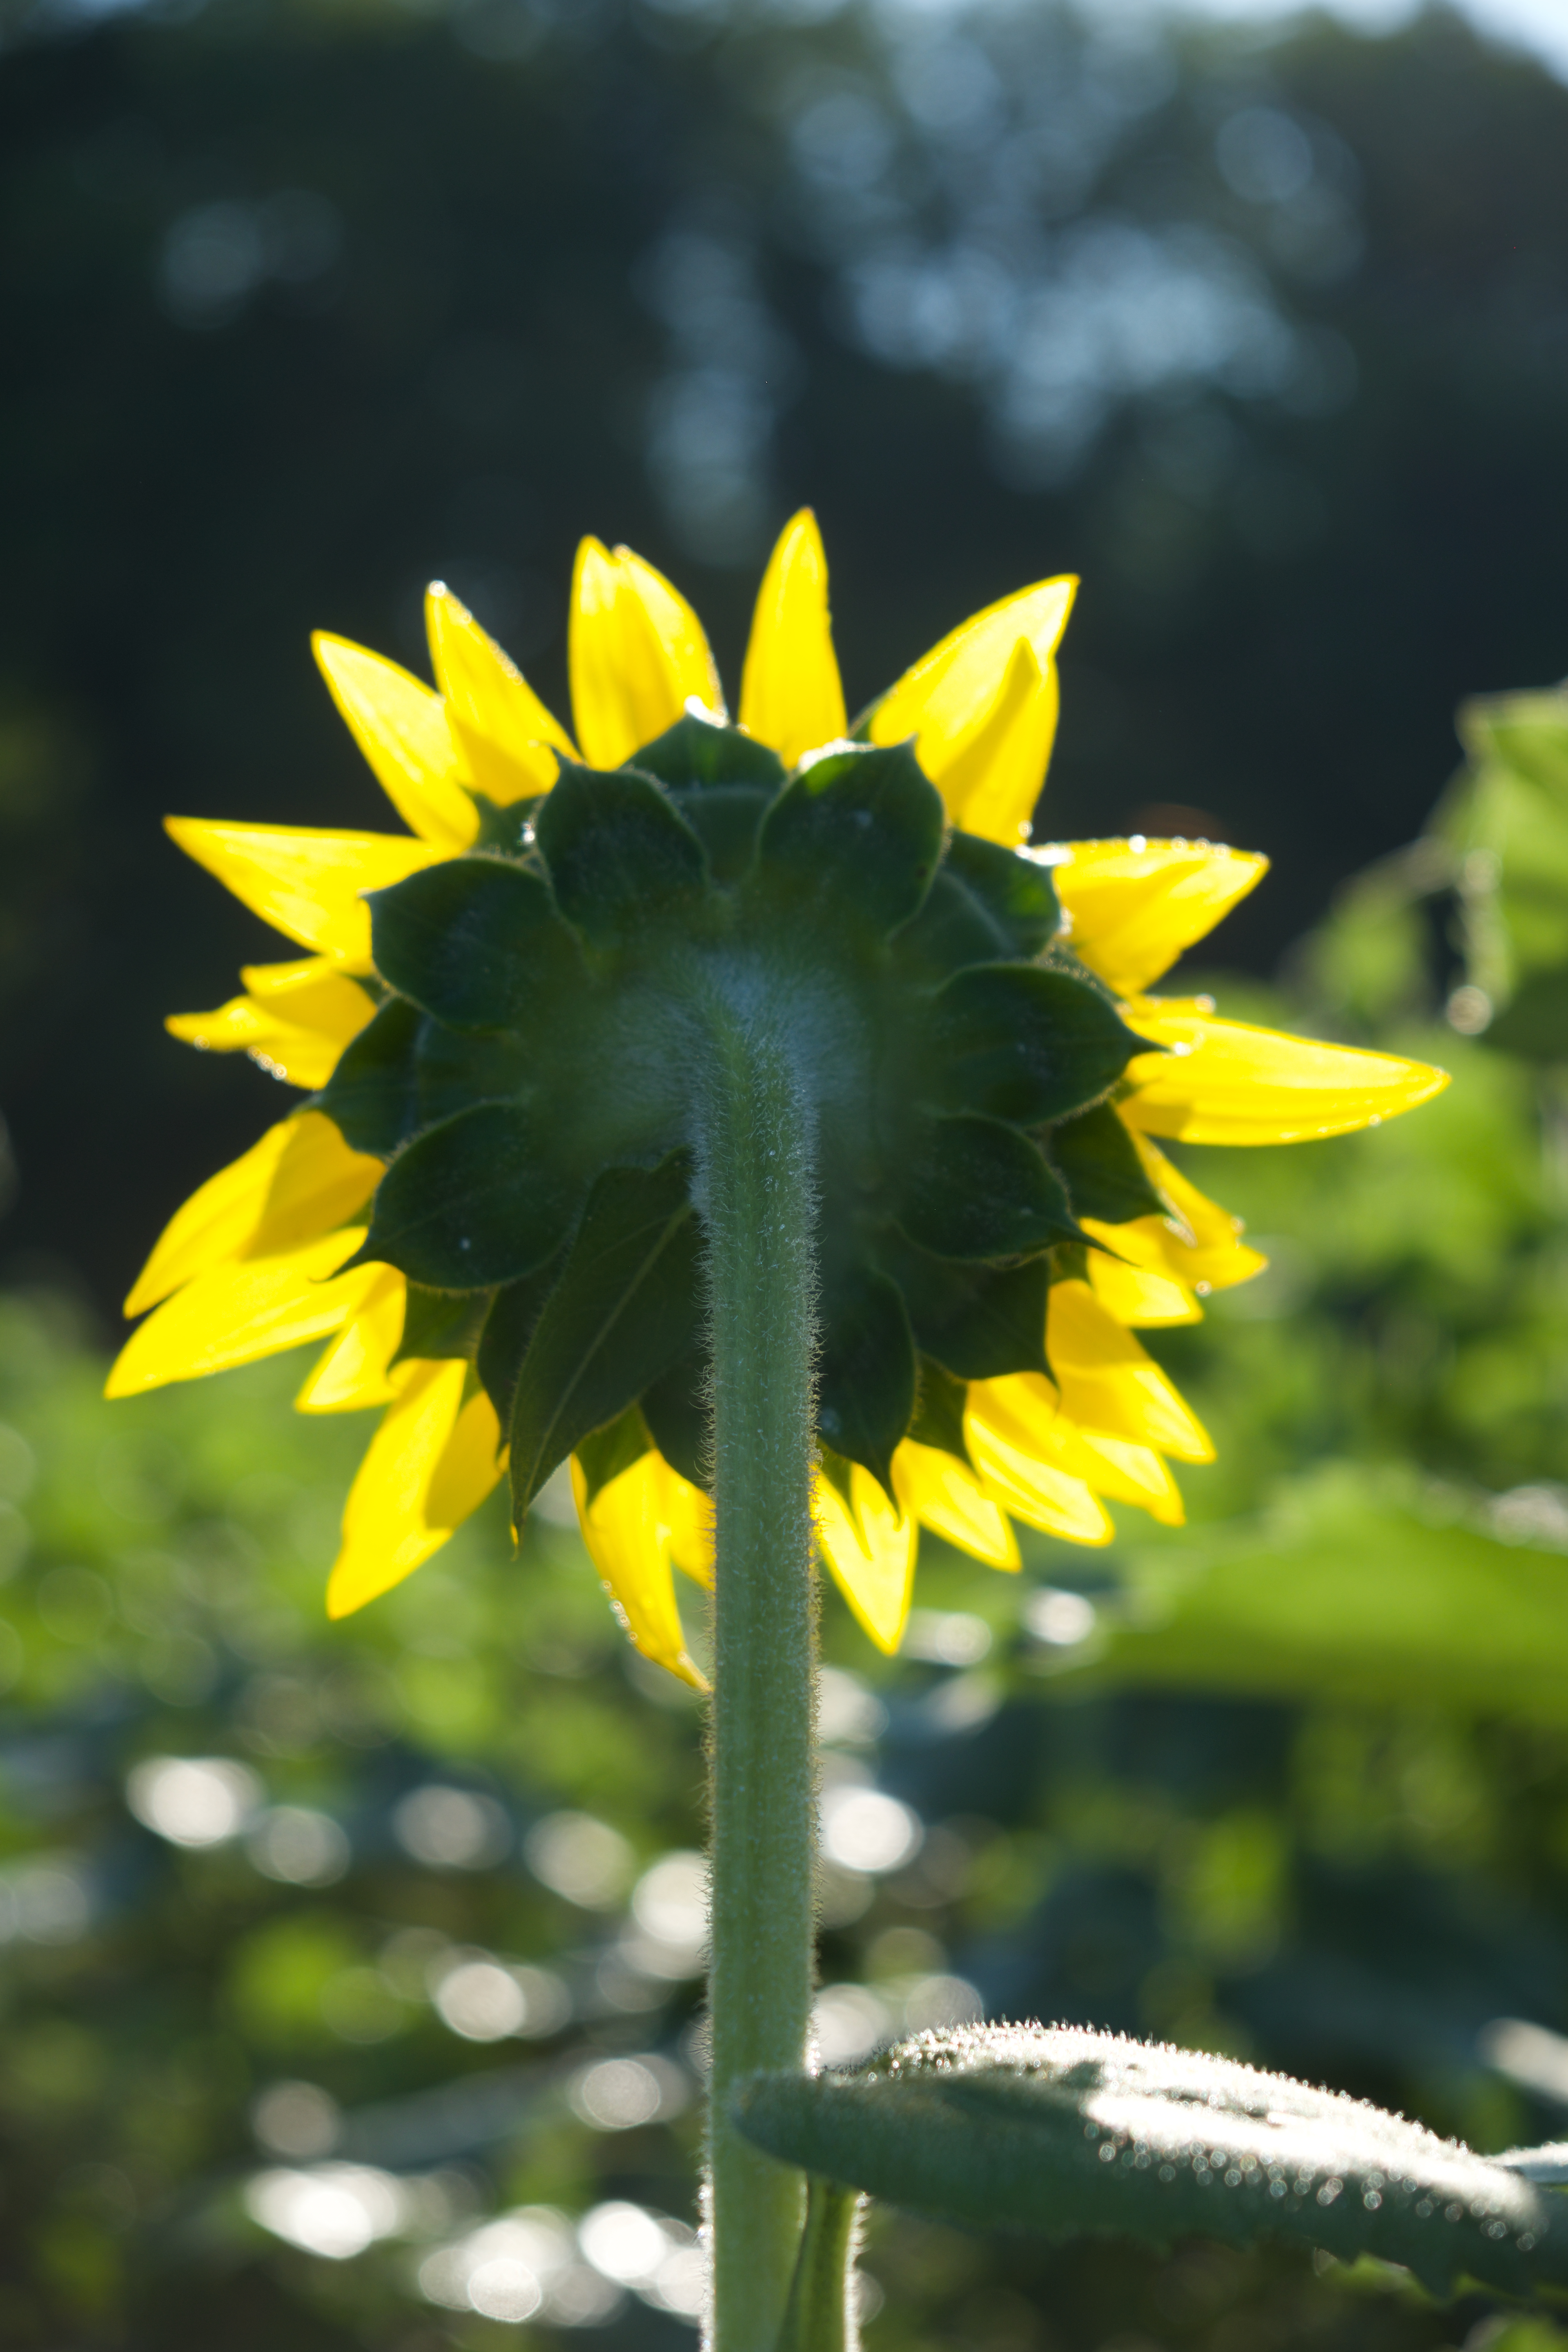
POOLESVILLE MD, July 16, 2017:
(Photo by Phil Fabrizio)
Tip 7 – Watch where you walk and what you carry – Opportunity
Ok, so we are all boy/girls scouts when us “pros” walk into the field. We carry a backpack, multiple cameras, lens, etc. etc. That backpack is heavy and cumbersome. Leave it in the car! Grab only the essentials, camera, and tripod, a few lenses and stick them in your pocket – see Tip 1. Plus that backpack knocks into the sunflower behind you as you swing or walk away making all the honeybees mad as heck. For those that are willing to venture into the sunflower rows remember where you walk and whose field of vision you are interrupting.
My friend Jonathan Newton (Washington Post) once “politely” called me out on a sideline saying, “Hey you are in my goal line.” At first I did not understand, he told me again, and then I realized I was standing in front of where his camera was aimed (a goal line). It was a lesson I never forgot. So if you must get that one or many sunflower composed picture just look around to see where other cameras are pointed and try as quickly as you can to “get out of their goal line.”
Tip 8 – Any time is a good time – Lighting
Sunrise. Sunset. It does not matter. Good light is good light. Take what God has given you on that day and make it work. See Tip 4 and 5.
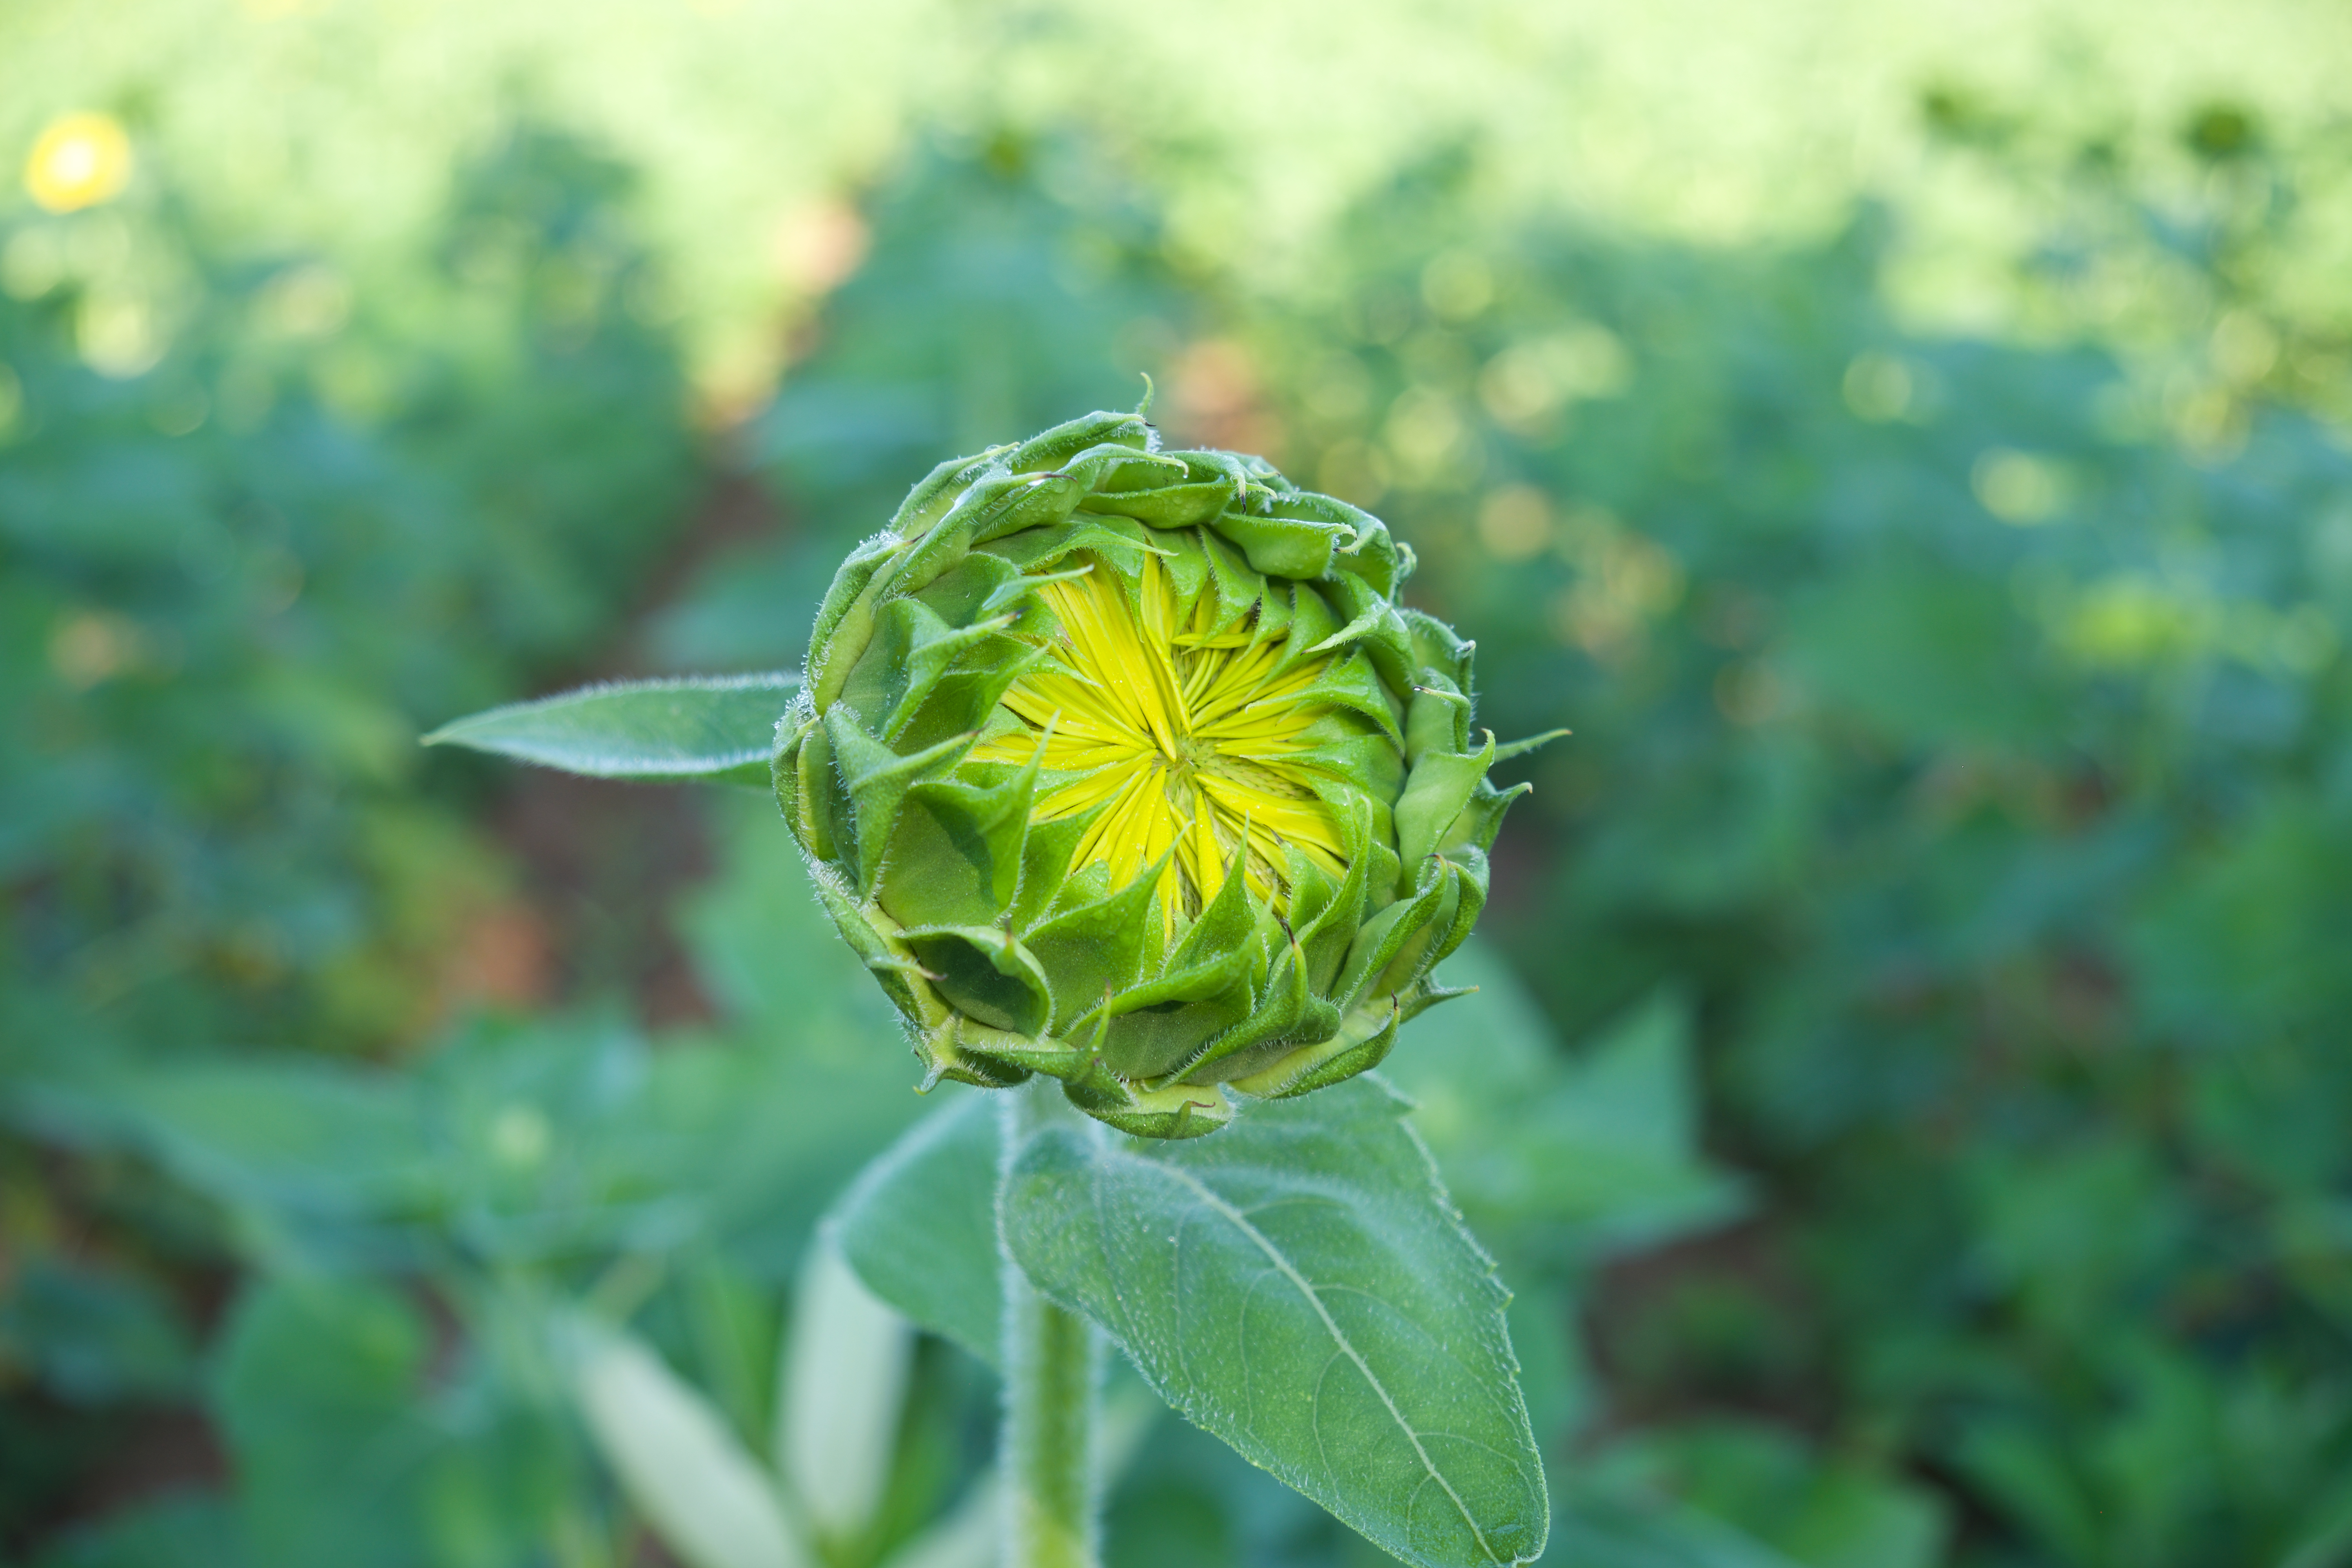
Tip 9 – Know your space – Get Close – no I really mean it – get close!
You will be tempted to take it all in with a landscape photo of all the sunflowers. Click. Take that picture and then forget about it! One landscape photo – your done. Rather, I propose that if you have a zoom lens (say a 70-200mm), bring it along, stick it in your pocket and swap out frequently as you come upon a sunflower that you can isolate in space using Tips 4 & 5 above. Otherwise, if you have a wider zoom anything around a 24 – 70mm or a 18-55mm kit lens keep it on the camera and GET CLOSE. I mean isolate that sunflower, bees and all. Make the background go out of focus – you want only that one sunflower perfectly shaped opened to gather in all the sun and bees it can hold before it folds.
Tips 10 – You’re a visitor – leave the sunflowers happy.
Ok, this one should be obvious. You are there looking at what someone (DNR) planted for your enjoyment and not your direct benefit – as in I think that sunflower would look good on my breakfast table. It might look good there but it wasn’t planted for that intended purpose. So if you want a sunflower see Tip 2 – and drive back to Darnestown Road to the Harris Teeter and buy one or more in their flower department. Remember you are not a part of the Management team in the Wildlife Management Area and thus please act within that respect. Take pictures, treasure them, print them out, share them, post them on Facebook, Instagram, or even here as comments to my post but please leave them happy where they are.
Alright, there you have it ten tips from a sports photographer on shooting flowers. What did you expect, the secret sauce – not a chance.
Before I wrap this up let me give you a few more things to consider, First, the MBWMA is what it says it is – a wildlife area. So depending on when you visit you will hear gunshots – yes gunshots from hunters who use nearby areas to hunt grouse and morning doves. It’s ok they can be there.

POOLESVILLE MD, July 16, 2017:
(Photo by Phil Fabrizio)
Bees. This is a highlight of the summer season for them. They go crazy for Cocoa Puffs and sunflowers. So if you place your 8 year old daughter’s face up next to a huge sunflower you and she should expect that eventually both may attract bees – I promise your they are more interested in the pollen on the yellow flower – so don’t move or touch or invade their “yellow” space. Take the pic, move quickly and try not to rattle the sunflowers.
My technical camera information. I shot these photos using a Fuji X-T2 Mirrorless camera with a 18-55mm kit lens using Fuji’s Velvia RAW image algorithm with a manual setting that stayed steady at ISO 200 and varied at f-stops between f4 and f18 and shutter speeds that were mostly around 1/60th of a second but on occasion at 1/2500th of a second. Time and location is a secret but it was an early morning in Poolesville. The X-T2 has a vertical power grip that allowed me to shoot vertical without cross-handed shutter confusion (and shadows).
MCM Reader’s Challenge:
If you want more information or want to share tips and work secrets for MCM readers I recommend that you write your comments to this blog and I will do my best to approve the comments and add a perspective.
I also challenge anyone who has created a great image at MBWMA to share it in the comment section – just be sure to watermark it as your own.
Phil Fabrizio
@PhotoLoaf
Copyright all photos 2017 © Phil Fabrizio

For eye catching, dazzling and stunning blossom photographs here is great tips and advice. One can learn many more from here. THANKS